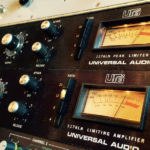
Compressors – A General Overview
Compressors lessen the dynamic range of an audio source by reducing the upper level and increasing the lower level signal. Effectively this allows a track to be more “present” in a mix.
There are several things that control “compression”:
Threshold – the level at which the signal starts to be reduced
Ratio – How much the signal is reduced. In other words a 1:1 compression is no compression. A 2:1 ratio is that for every 2 db of gain over the threshold, the sound will be reduced by 1db.
Etc….
Attack – how quickly the compressor kicks in once it “hears” the signal. Usually measured in milliseconds
Release – How soon the compressor stops after sound level is below the threshold.
Knee – Determines how much compression is added when the sound passes the threshold. Hard Knee compression “clamps” down the signal, where soft knee is more forgiving and gentle. Make-up Gain: allows you to boost or reduce the compressed signal. A signal is often attenuated (reduced) by the act of compression.
Output: This allows you to increase or decrease the level at the output of the compresso.
Before we get into a discussion about how compressors work, we need to know the different types of compressors out there, and what they do differently.
VCA
“Voltage Controlled Amplifier”
Extremely versatile. Won’t change the characteristics of the audio signal you’re processing. Allows for HEAVY compression with a transparent sound.
Examples:
SSL G-Series Stereo Bus Compressor and channel compressor API 2500 Stereo Bus Compressor
Chandler RS124
FET
“Field Effect Transistor”
Super fast attack and decay times. Not good for soft compression (i.e. knocking off the top 1db of a mix bus etc…) Good for Hard compression and non musical coloration. Great on drums and other sources that require punch.
Examples
Universal Audio 1176 Daking FET III Chandler Little Devil
Optical
Reacts slower to the sound source (slower attack and decay). Very popular for its transparent, “natural” sound.
Examples:
Universal Audio LA -2A and LA – 3A Avalon AD2044
Variable MU
One of the oldest styles of compressor. It increases its effect as the sound passes through and hits the threshold. It has a smooth and very “vintage” sound. These types of compressors are usually found and used in mastering studios.
Fairchild 660 and stereo 670(if you can afford one) Federal AM-864/U
Manley Variable MU Altec 436B
Chandler Limited RS124
Multi-Band
This is a combination of Compression and Equalization that we’ll get into in another discussion:
Now that we know what the different kinds of compressors are, and the different controlling factors, let’s talk about how to use them.
Using Compressors
Most people, especially when they’re just starting out in audio production, think that the more compression you use the better. But then they quickly find that this is most definitely not the case. Their mixes sound muddy and un-dynamic.
Compression can be used in it’s extremes, but mostly to cause an effected type of sound, like overdriving, or a super squashed sound. But where compression shines is in using it in smaller doses.
The very nature of compression lessens the dynamic range of the sound. In other words, it brings up the lower levels of an audio source, and lowers the upper levels. Finding the correct settings for your compressor for the source you’re working with, takes a little time and finesse.
Example: On a vocal, a compressor will help to increase the level of lower sections of a vocal take, and reduce the really big levels, making it sit in a mix better, with less need for automation.
Not all compressors provide you with use all of the controls described above. Some only give you gain and reduction controls (like the LA-2A and LA-3A). Some give you fixed controls over the signal ratio along with gain and reduction (like the 1176).
These are much easier to work with, especially for the entry level to mid level sound engineer. You simply turn a couple of knobs, watch the VU meter, and listen to the output until it sounds right to your ear, and in the mix.
In the more complicated types of compression, you will have to make decisions about how much attack and how much decay you want on your signal. The lower the attack time, the more it will take the “Snap” out of your sound. In other words, if you have your attack set to 0, the sound of your snare will have less “stick” in it. The more you open up the attack, the more of the initial hit sound of the stick you’ll get.
With decay, the more decay you have, the longer the sound will be compressed. So, for instance, let’s say you have a source like a drum tom. This source has a very high level of sound immediately and quickly lowers in level. If you’re looking for a very tight tom sound, you won’t want to have your decay set for very long, as it will amplify the decay of the tom hit, making it “ring” out. So, for toms, I typically like to have a moderate amount of attack and decay.
The thing about compression is that you have to play with it, alot, to get to know which types you like on which sources.
Generally, I love Optical and VCA Compression on Vocals, guitars, strings, piano, and pretty much anything (except drums… and sometimes even drums).
I really only use the FET type of compressor when I need VERY aggressive compressing like on drums, or heavy electric guitars.
The most important thing that I’ve learned about compression is to find the level that sounds best to my ear, and roll it back just a touch. Too much compression will flatten out your mix, and remove all of the dynamics of your recordings.
So that, in a nutshell, is Compression. I hope this helps y’all with understanding them, and how to use them.
Happy Home Recording

